Pages

Thursday, May 14, 2015

GLITTER HEAT TRANSFER PILLOW


Besos-Pillow copy

Valentines is coming up!  Valentines Day is one of my favorite holidays, probably because I love all things girly and Valentines is full of hearts, pink, red, purple, and sparkly things.  I decided to make a fun Valentines pillow for my living room.  I found this super cute kissing silhouette design in the design store and I just had to use it.  I added Besos (kisses in Spanish) under the design for a fun little modern touch.  (My husband and I both speak Spanish so I thought that would be fun.)

Besos Pillow| Amy Cox for Silhouette

Can I just tell you how much I LOVE the new glitter heat transfer material!!!  It is my new favorite Silhouette product!  It is so super glittery and fun.  I want to put it on everything!  I have found that it cuts best on the Heat Transfer Flocked setting.  I seriously love this stuff!!!

Besos Pillow| Amy Cox for Silhouette

Besos Pillow| Amy Cox for Silhouette

Monday, January 12, 2015

2015 PLANNER STICKERS

Planner-Stickers

I am so excited for the new year!  I bought this amazing planner to help keep me organized and I’ve had fun making plans for the year so far.  I decided to make some fun stickers to help decorate my planner.  I went shopping in the design store to find designs that add a little pizzazz to the pages.  Here’s what I came up with and how I did it….

Planner Stickers| Amy Cox for Silhouette
  •  Open all of the designs you want to use and shrunk them down to under an inch.
  • Select all of the designs that aren’t print and cut designs and turn the cut lines off. (I decided that because I am making them so small it would be a good idea to cut a little box around the shape instead of trying to make them too detailed.)
  • Draw a box the size you want all of your stickers to be.  (I like the one with the rounded corners.) I did mine as 1/2″ squares.
  • Color all of the designs the way you want them and center them inside the boxes, then group them together.
  • Now simple just print and cut!
Planner Stickers| Amy Cox for Silhouette

I did a lot of little workout stickers to help make a good plan for my new year goals.  I also did a bunch of chore stickers to help me keep up with the house work, which can be quite challenging with a little tornado running around the house!  I love the way it turned out!

Planner Stickers| Amy Cox for Silhouette

Saturday, December 20, 2014

MAGNETIC ADVENT CALENDAR

Don't you just LOVE getting free designs?!!!  Silhouette is so good to us, don't you think?  I'm loving the 12 days of free designs till Christmas.  I love this design today.  There are so many things you can do with it.  I debated doing a fun Christmas pillow or some wall art but then I had an idea that made me super excited....a magnetic advent calendar for my fridge!  Here's what I did.....
Advent Calendar|Amy Cox for Silhouette
That open sleigh was just begging to have presents in it!  So I filled it up.  :)  Here is a quick step by step...
  • After I opened the design I filled it with a fun pattern and made the cut lines black and thicker.   I also did this with the words and placed them where I wanted them.
  • TURN OFF THE CUT LINES ON THE WORDS!  You do not want to forget this step or you will cut them right out.
  • I picked a fun Christmas tree design and presents as well and added the pattern.
  • Then I found a font I liked, typed all of the numbers I needed (do them all separately so you can move them around).
  • Fill the numbers with the color white.  Right click on the number and select "Bring to Front".  Then place them on top of the present designs.
  • AGAIN TURN OFF THE CUT LINES ON THE NUMBERS!
  • Turn on the registration marks.
  • Now it's easy...just print the designs on magnet paper and cut them out!  I got the whole thing cut out with just 2 sheets of paper.
Advent Calendar|Amy Cox for Silhouette
I am in love with the print and cut feature on the Silhouette.  It is so amazing and makes doing projects so stinkin' easy!
Advent Calendar|Amy Cox for Silhouette
My vision with this advent calendar is that at the beginning of the month all of the presents started out in the sleigh.  Then each day we move a present under the tree.  So the kiddos will know it's Christmas when all of the presents make it under the tree.  I loved the anticipation of Christmas as a child.  I think that this advent calendar would have made me so excited everyday to imagine more presents under the tree.  It also would have given my parents more ammo to get me to do good so Santa would come.  ;)
Advent Calendar|Amy Cox for Silhouette
You can hang this on the fridge as I did or you could even do it on a cookie sheet if you want to.  Then you could put it in any room you want to in your house.
Designs used:
Oh what fun (Free Design) on 12/20/14
The present design I believe was an exclusive design that came with the advent calendar frame.
The green polka dot present pattern and the yellow polka dot pattern were patterns that came with my Cameo.

Monday, December 1, 2014

Rhinestone Kit Giveaway and Silhouette Design Team Blog Hop!!!

I'm super excited for my post today!  I get to highlight one of my favorite Silhouette products and also do a giveaway!!!  We as the Silhouette Design Team are also doing a blog hop!  So you can see what all of our favorites are and enter to win a lot of prizes!!!


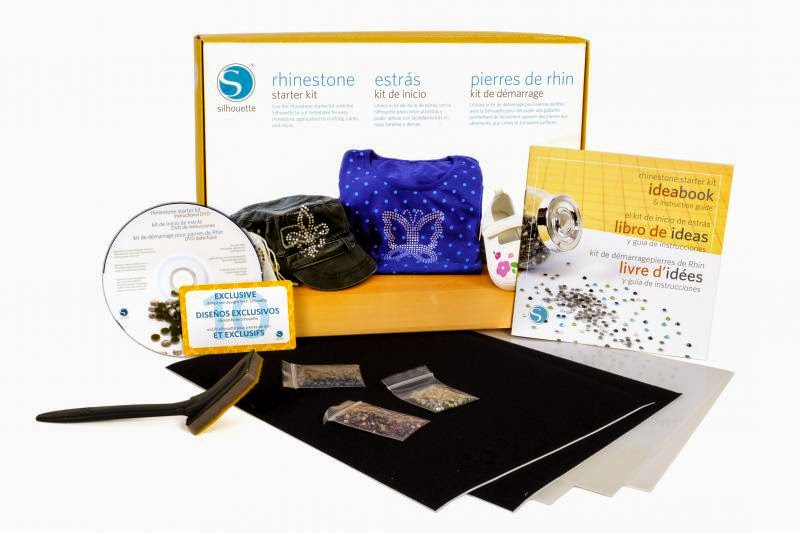
I chose the Rhinestone Starter Kit because it is so amazing!  I love things that sparkle, but have you ever tried to do a rhinestone design with a single rhinestone setter?  It takes FOREVER!  So when I got my Silhouette Cameo last year for Christmas I was so excited to discover that I could make rhinestone templates.  I love these for so many reasons....  I love that I can make one template and use it again and again.  I love that it is so quick and easy to use.  I love that there is a transfer paper that helps me line up the design just right on my project and can be ironed.  The whole process is wonderful!  I chose this one also so that one lucky winner can also fall in love with the Rhinestone Starter Kit, and hopefully I will inspire the rest of you to try it out as well.  :)


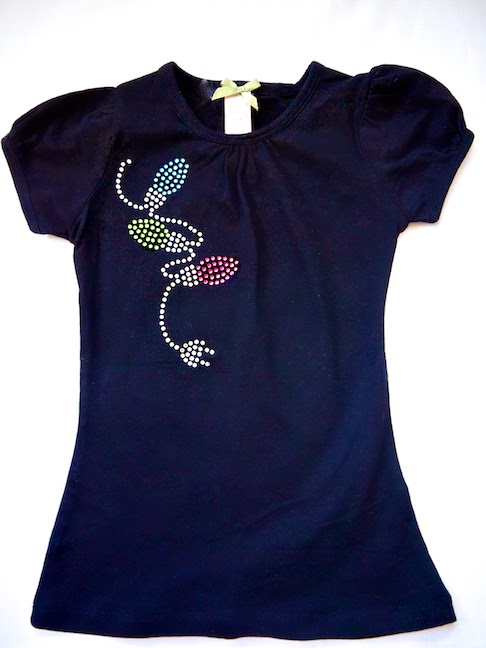
Ok, how cute is this rhinestone Christmas light design on this little T-shirt?!  I like to make things for my daughter that not everyone else will be wearing.  Using my Silhouette always helps me accomplish this.


I know it may take a little bit of time to weed out the holes on the template velvet if you don't get it pulled off quickly, but this finished result is totally worth it!  It may sound a little weird, but sometimes I enjoy weeding out my designs.  It's just fun to see it come to life I guess.


And yes...the shirt is way cuter on.  I may also think that I have the cutest daughter in the whole world!!!  Don't you just want to pinch those cheeks?

Your next blog in our blog hop is...Cari Locken
Incase you missed the one right before me here's her link as well....Nicole Nowosad

What would you make if you won this Rhinestone Starter Kit?  I'd love to hear your ideas in the comments below!

Enter here for a chance to win the Rhinestone Starter Kit!

a Rafflecopter giveaway

Saturday, November 29, 2014

DIY VINYL BIN LABELS


I love using graphic designs to decorate whenever I can.  I have a bunch of fabric covered bins in my house and I love finding fun ways to label them with Silhouette’s adhesive vinyl.  I love using the adhesive vinyl because then if I change my mind about what I want to use the bin for I can easily change the vinyl label as well.

DIY Bin Label|Amy Cox for Silhouette

I have a lot of bins I could decorate, but I started out with these two.  I love doing nails and knitting.  Both of these hobbies create a mess that I have to organize.  So I went on a search of the Silhouette design store to find designs that would inspire me.  I found this cute nail polish designand this awesome knitting ball design.  They turned out really fun.  My daughter LOVES them, or at least loves playing in them.  :)

DIY Bin Label|Amy Cox for Silhouette

signature Amy-Cox
My Profile  |  My Blog  |  Instagram  | Pinterest
Designs used:

DIY FABRIC INK / FABRIC APPLIQUE PILLOW COVER


Love is on my mind this month as my husband and I just hit our 5th wedding anniversary.  I decided to make a cute pillow with this love point desing to remember this milestone.  I LOVE using the sewable fabric interfacing and it goes great on pillows!
Here are a few tips for you today, one on working with multiple layers of sewable fabric interfacing and another on stencil vinyl.

DIY Love is here pillow|Amy Cox for Silhouette

After I cut out the design I decided to sew the heart onto the circle first so I wouldn’t have all of the fabric from the pillow to fuss with in the sewing machine.  Since I had already removed the paper backing to cut the fabric I needed to make sure I didn’t iron the design to my ironing board.  So I found the paper from the back of the circle and placed the designs on that to heat the heart to the circle.

DIY Love is here pillow|Amy  Cox for Silhouette

I let the fabric cool then I sewed around the heart with the paper still attached.  Doing this helped keep the plasticy part of the interfacing from sticking to the machine while I sewed.  Then just tear the paper away when you are finished with that step.  I did this to sew the heart onto the circle, then again to sew the circle to the point.

DIY Love is here pillow|Amy Cox for Silhouette

The second tip I have is for using the stencil vinyl and fabric paint.  Sometimes it is hard to see the design you have cut because it is clear vinyl with clear transfer tape.  So I like to trace around the design with a marker to make it easier to line up on the fabric I am using.

DIY Love is here pillow|Amy Cox for Silhouette

I hope you enjoyed this project and that it will inspire you to create something fun as well!


signature Amy-Cox
My Profile  |  My Blog  |  Instagram  | Pinterest

Designs used:
love (double-sided adhesive starter kit shape)

DIY RHINESTONE TEE

Rhinestone-Tee

I am so in love with the rhinestone kit from Silhouette! It makes doing a rhinestone project so stinking easy.  For this project I used the metallic rhinestones, they give a bit of a studded feel to the project.  For some reason I wanted the studded feel to go along with my daughters cute little pink boots (which I am super jealous of, why, oh why don’t they make them in adult sizes!)

DIY Rhinestone Tee|Amy Cox for Silhouette


A little tip I have for using the rhinestone template material is to follow the directions and pull the material off quickly from the backing it is on when it is cut.  This will save you a lot of time trying to weed out sticky little circles.  Seriously though, if you do this right you can have a rhinestone project finished in less than 10 minutes, which is something you could never say if you have to heat each rhinestone individually.

DIY Rhinestone Tee|Amy Cox for Silhouette


Here is my cute little daughter sporting her new Tee, along with one of her besties.

signature Amy-Cox